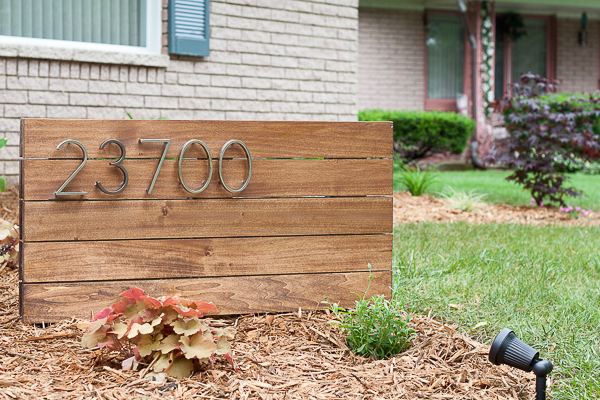
The weather here in Michigan is struggling (for lack of a better word), but I know a bunch of you are celebrating some beautiful spring weather! And beautiful spring weather means projects! And projects mean–ok, moving on.
Address Sign
Well if one of your projects involves a new address sign, I have just the tutorial for you. I’m here for you.
Image may be NSFW.
Clik here to view.
I did a front yard makeover for a reader, and she wanted a mid century vibe. It was a little out of my comfort zone, but I knew “clean lines”…and who doesn’t love clean lines?
Image may be NSFW.
Clik here to view.
Here’s the breakdown:
I chose poplar for this project since it was such a focal point in the walkway. Thought the nicer finish would be better.
- 5–8ft 1×4’s
- Wood glue
- Brad nails (I used a brad nailer for this, but you could hammer it manually and sink the brads)
- Pre-stain wood conditioner
- Minwax Early American Stain
- Helmsman Urethane to protect it from the elements
- Paint/Stain brush (my favorite, and I use it for almost all applications)
- Floating house numbers (brushed nickel) I purchased these at Lowes, but these are similar.
The fundamental list is actually quite short, but you do need a couple of things to keep it protected.
Address Sign Directions
This is really my favorite part because I kept it simple.
- I literally used one type of wood and attached it all together.
- I cut down the 1×4’s into 36″ lengths.
- I measured about how high I wanted it from the ground and figured that using 5 rows was about the right height.
Image may be NSFW.
Clik here to view.
For the three pieces in between, I just kept them long enough to bury them. I think they ended up being about 26 inches? The three went into the ground to stabilize, and then the mulch kind of wrapped around it to keep it more secure.
Image may be NSFW.
Clik here to view.
I ran some wood glue along the three vertical pieces to stabilize the wood and nailed each piece in. I used a piece of scrap wood to space them apart ever-so-slightly. Once the front was in place, I did the same on the back. Built. #micdrop
Image may be NSFW.
Clik here to view.
Once it was built, I applied pre-conditioner, stain, then urethane to protect it. Be sure to get into all those ridges and backs!
Finally, I attached the numbers and walked away slowly. Woot! Seriously one of the easier projects I’ve done, and it makes a huge impact!
*Some affiliate links are used. They help me pay for this blog. Image may be NSFW.
Clik here to view.
The post DIY Mid Century Modern Sign first appeared on Just a Girl Blog.
Author information
The post DIY Mid Century Modern Sign appeared first on Just a Girl Blog.
