The weather here in Michigan is struggling (for lack of a better word), but I know a bunch of you are celebrating some beautiful spring weather! And beautiful spring weather means projects! And projects mean–ok, moving on.
Address Sign
Well if one of your projects involves a new address sign, I have just the tutorial for you. I’m here for you.

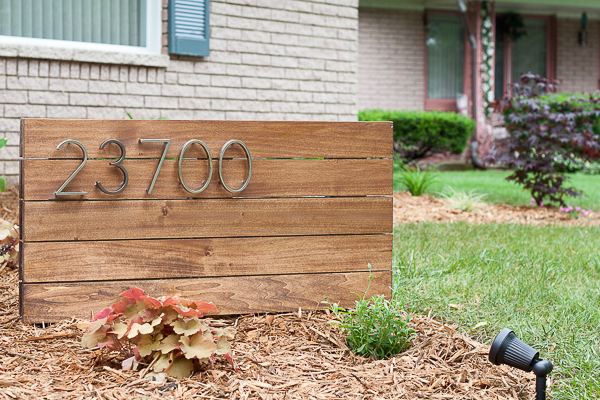
I did a front yard makeover for a reader, and she wanted a mid century vibe. It was a little out of my comfort zone, but I knew “clean lines”…and who doesn’t love clean lines?
Here’s the breakdown:
I chose poplar for this project since it was such a focal point in the walkway. Thought the nicer finish would be better.
- 5–8ft 1×4’s
- Wood glue
- Brad nails (I used a brad nailer for this, but you could hammer it manually and sink the brads)
- Pre-stain wood conditioner
- Minwax Early American Stain
- Helmsman Urethane to protect it from the elements
- Paint/Stain brush (my favorite, and I use it for almost all applications)
- Floating house numbers (brushed nickel) I purchased these at Lowes, but these are similar.
The fundamental list is actually quite short, but you do need a couple of things to keep it protected.
Address Sign Directions
This is really my favorite part because I kept it simple.
- I literally used one type of wood and attached it all together.
- I cut down the 1×4’s into 36″ lengths.
- I measured about how high I wanted it from the ground and figured that using 5 rows was about the right height.

For the three pieces in between, I just kept them long enough to bury them. I think they ended up being about 26 inches? The three went into the ground to stabilize, and then the mulch kind of wrapped around it to keep it more secure.

I ran some wood glue along the three vertical pieces to stabilize the wood and nailed each piece in. I used a piece of scrap wood to space them apart ever-so-slightly. Once the front was in place, I did the same on the back. Built. #micdrop

Once it was built, I applied pre-conditioner, stain, then urethane to protect it. Be sure to get into all those ridges and backs!
Finally, I attached the numbers and walked away slowly. Woot! Seriously one of the easier projects I’ve done, and it makes a huge impact!
*Some affiliate links are used. They help me pay for this blog. 
The post DIY Mid Century Modern Sign first appeared on Just a Girl Blog.
Author information

The post DIY Mid Century Modern Sign appeared first on Just a Girl Blog.